
Supplies you will need:
- small thrift store bird cage (Make sure you can fit your hand and pots in the cage opening.)
- 3 small terracotta pots or any other small container for planting with small drainage trays or rocks in the bottom of the pots for drainage (You may need more or less depending on the size and shape of your birdcage.)
- spray paint (I used chalkboard paint but you could do a fun color instead.)
- potting soil
- little plants, at least one for each pot (Succulents are the easiest for transplanting and surviving and really easy to find.)
- floral decor moss (There are different kinds and colors, use which works for your taste and colors. I used the dull grey moss and some found brown hairy natural material in the bottom for fluffing.)
Now to put it all together!
Step 1: Paint Your Pots
Put your little pots upside down on cardboard or other surface you don't care about getting painted. If you have drainage trays you can paint them too but they won't be visible later. Spray your pots well. Let dry and repeat if a second coat is needed. Flip and spray the top and inside of the rims of the pots. Repeat with your drainage trays if you have any. It's okay if they are painted all through the inside. Let dry. The pots pictured are not the ones I used but an example of how I paint my pots.


Step 2: Add Soil and Plants
When you pots are completely dry, add little rocks or broken pottery chips to the bottom of your pots. You don't need much and the rocks/pottery chips should be small but not clog the drainage holes. Add potting soil to the brim of the pots. Pop your little succulents or chosen plant firmly into the soil. Repeat with all your pots. You can add little pebbles or sea glass around the plant but it may look to busy or get hidden in the moss. Thanks mom for potting the little guys!


Step 3: Assemble Pots and Moss
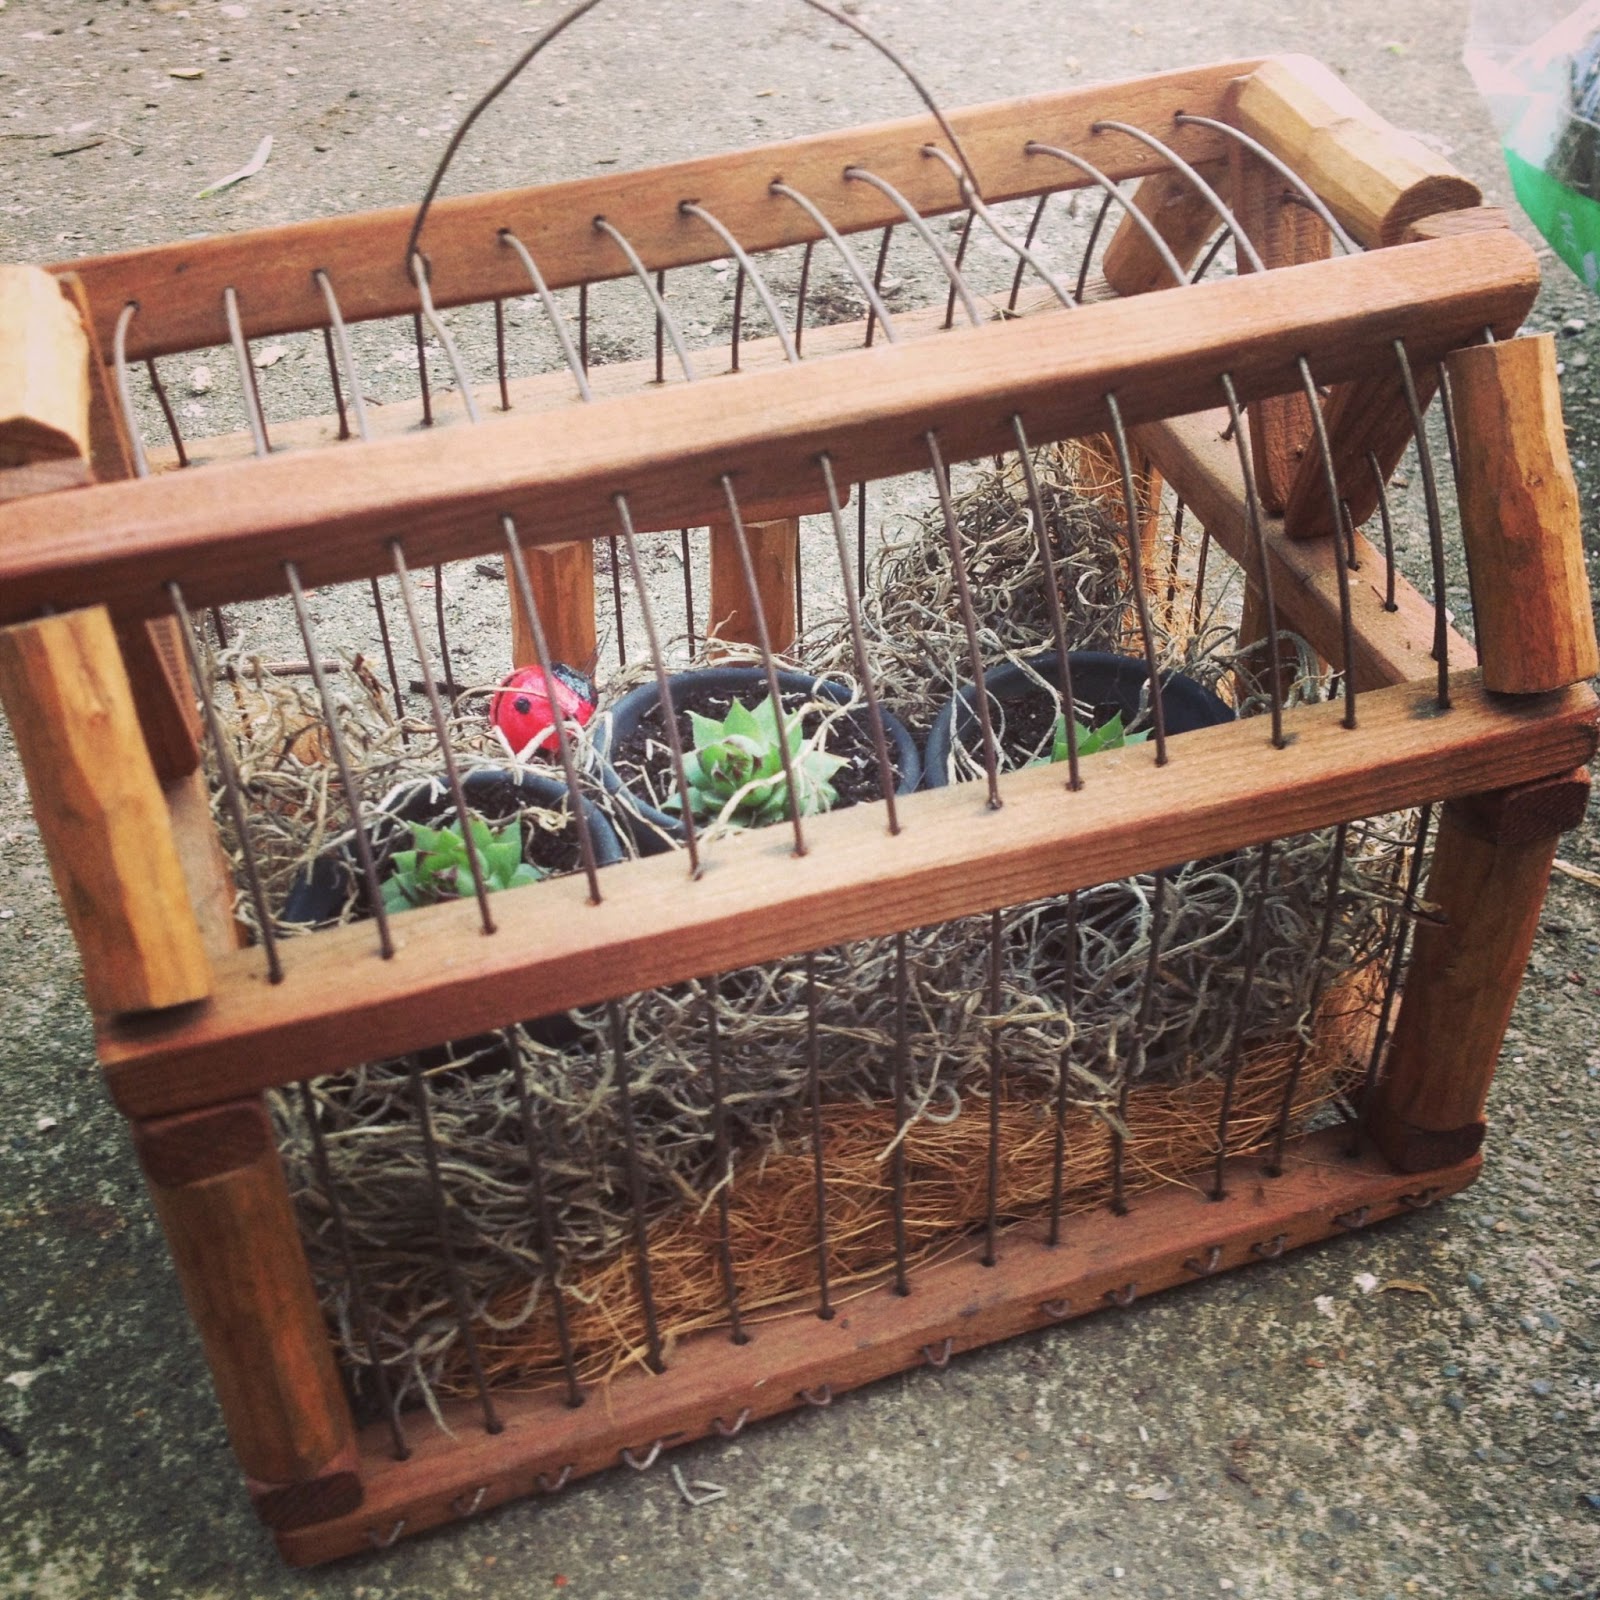
If you can't fit your hand or pots into your chosen bird cage very well, this step will be challenging. (Can you tell I'm emphasizing this from experience?) Your pots are not heavy so it may take an octopus hand maneuver to achieve the following steps. Place some moss on one end of the cage and hold in place with your first little pot. Put some moss against the opposite edge of your bird cage and slide in your second pot to hold in place. Put some moss around your first and second pots and slide your third pot between them. Add or remove moss in order to see your plants well but have them snugged in with moss. Add a little mushroom bird or bug and lightly water your plants.


Now to put it all together!
Step 1: Paint Your Pots
Put your little pots upside down on cardboard or other surface you don't care about getting painted. If you have drainage trays you can paint them too but they won't be visible later. Spray your pots well. Let dry and repeat if a second coat is needed. Flip and spray the top and inside of the rims of the pots. Repeat with your drainage trays if you have any. It's okay if they are painted all through the inside. Let dry. The pots pictured are not the ones I used but an example of how I paint my pots.


Step 2: Add Soil and Plants
When you pots are completely dry, add little rocks or broken pottery chips to the bottom of your pots. You don't need much and the rocks/pottery chips should be small but not clog the drainage holes. Add potting soil to the brim of the pots. Pop your little succulents or chosen plant firmly into the soil. Repeat with all your pots. You can add little pebbles or sea glass around the plant but it may look to busy or get hidden in the moss. Thanks mom for potting the little guys!


Step 3: Assemble Pots and Moss
If you can't fit your hand or pots into your chosen bird cage very well, this step will be challenging. (Can you tell I'm emphasizing this from experience?) Your pots are not heavy so it may take an octopus hand maneuver to achieve the following steps. Place some moss on one end of the cage and hold in place with your first little pot. Put some moss against the opposite edge of your bird cage and slide in your second pot to hold in place. Put some moss around your first and second pots and slide your third pot between them. Add or remove moss in order to see your plants well but have them snugged in with moss. Add a little mushroom bird or bug and lightly water your plants.


Voila! Bird cage mini-garden for your table or hanging.

If you make your own, please email pictures. I can't wait to see your bird cage garden designs!
Happy Planting,
- Cerise


No comments:
Post a Comment