- Cerise
Showing posts with label garden. Show all posts
Tuesday, May 21, 2013
Mother's Day Gifting
Mother's Day was so much fun this year. 9 hole, 3 par golf, dinner, and family time. My mom also enjoyed her gift I made. Last minute touches were painted on Mother's Day morning but fortunately acrylic paint dries really fast and I didn't wast time sleeping in too late. Here is the final project. Look forward next week to the how-to for this project and a similar one my friend made the same day.
Labels:
black,
blue,
chalkboard,
flowers,
garden,
green,
mom,
mother's day,
painting,
peach,
planter,
succulents
Friday, April 26, 2013
Add Color To Your Planters: Part 2
Well I didn't really get the photos up that I wanted to post on Wednesday. I realized too late that the pictures I used were already posted! Oh well. Here are more spray-painted creations. Oddly enough I got both these from a neighbor a LONG while back and have been toting them around all ugly so I finally spruced them up. I used terracotta pots in the hanging planter and spray painted them. Terrible quality spray pain. Did I mention this is the summer of spray paint?
Happy Color Sprucing,
- Cerise
Wednesday, April 24, 2013
Add Color to Your Planters: Part 1
Pretty pots are my favorite for flowers and herbs on the deck. But price is always a factor and since I find a lot of freebies and cheap pots for planting they can be ugly or drab. This is the summer of spray paint and I'm starting early by revamping some old garden pots and plant stands that have been lying around growing ugly for the last few years. My favorite color so far is a sweet ocean blue turquoise paint that I happened across at the hardware store. It looks amazing with the yellow I picked up and is going to look fabulous with pinkish red carnations.
Painting pots is super easy and fast. I used old and new terracotta pots and some grubby plastic planters. To keep it looking good all around, I painted terracotta drainage dishes and old plates I use for drainage dishes. The spray paint is easy to scrape off slick plates so be aware that this won't last forever on your fancy china. I still need to find some chalk to label the plants in my chalkboard painted pots. I also went crazy on plant stands that I will post about tomorrow in Part 2 so stay tuned.
Here are the pots and plates I painted. I'm going to hunt for red and a better quality yellow this weekend and more pots so I can mix and match the drainage dishes and experiment with patterns. Check back next week for Part 3 to see how it goes!
(Don't forget to do this in an open area away from pets and plants)
Happy Painting,
- Cerise
Tuesday, April 23, 2013
Bird Cage Garden Tutorial
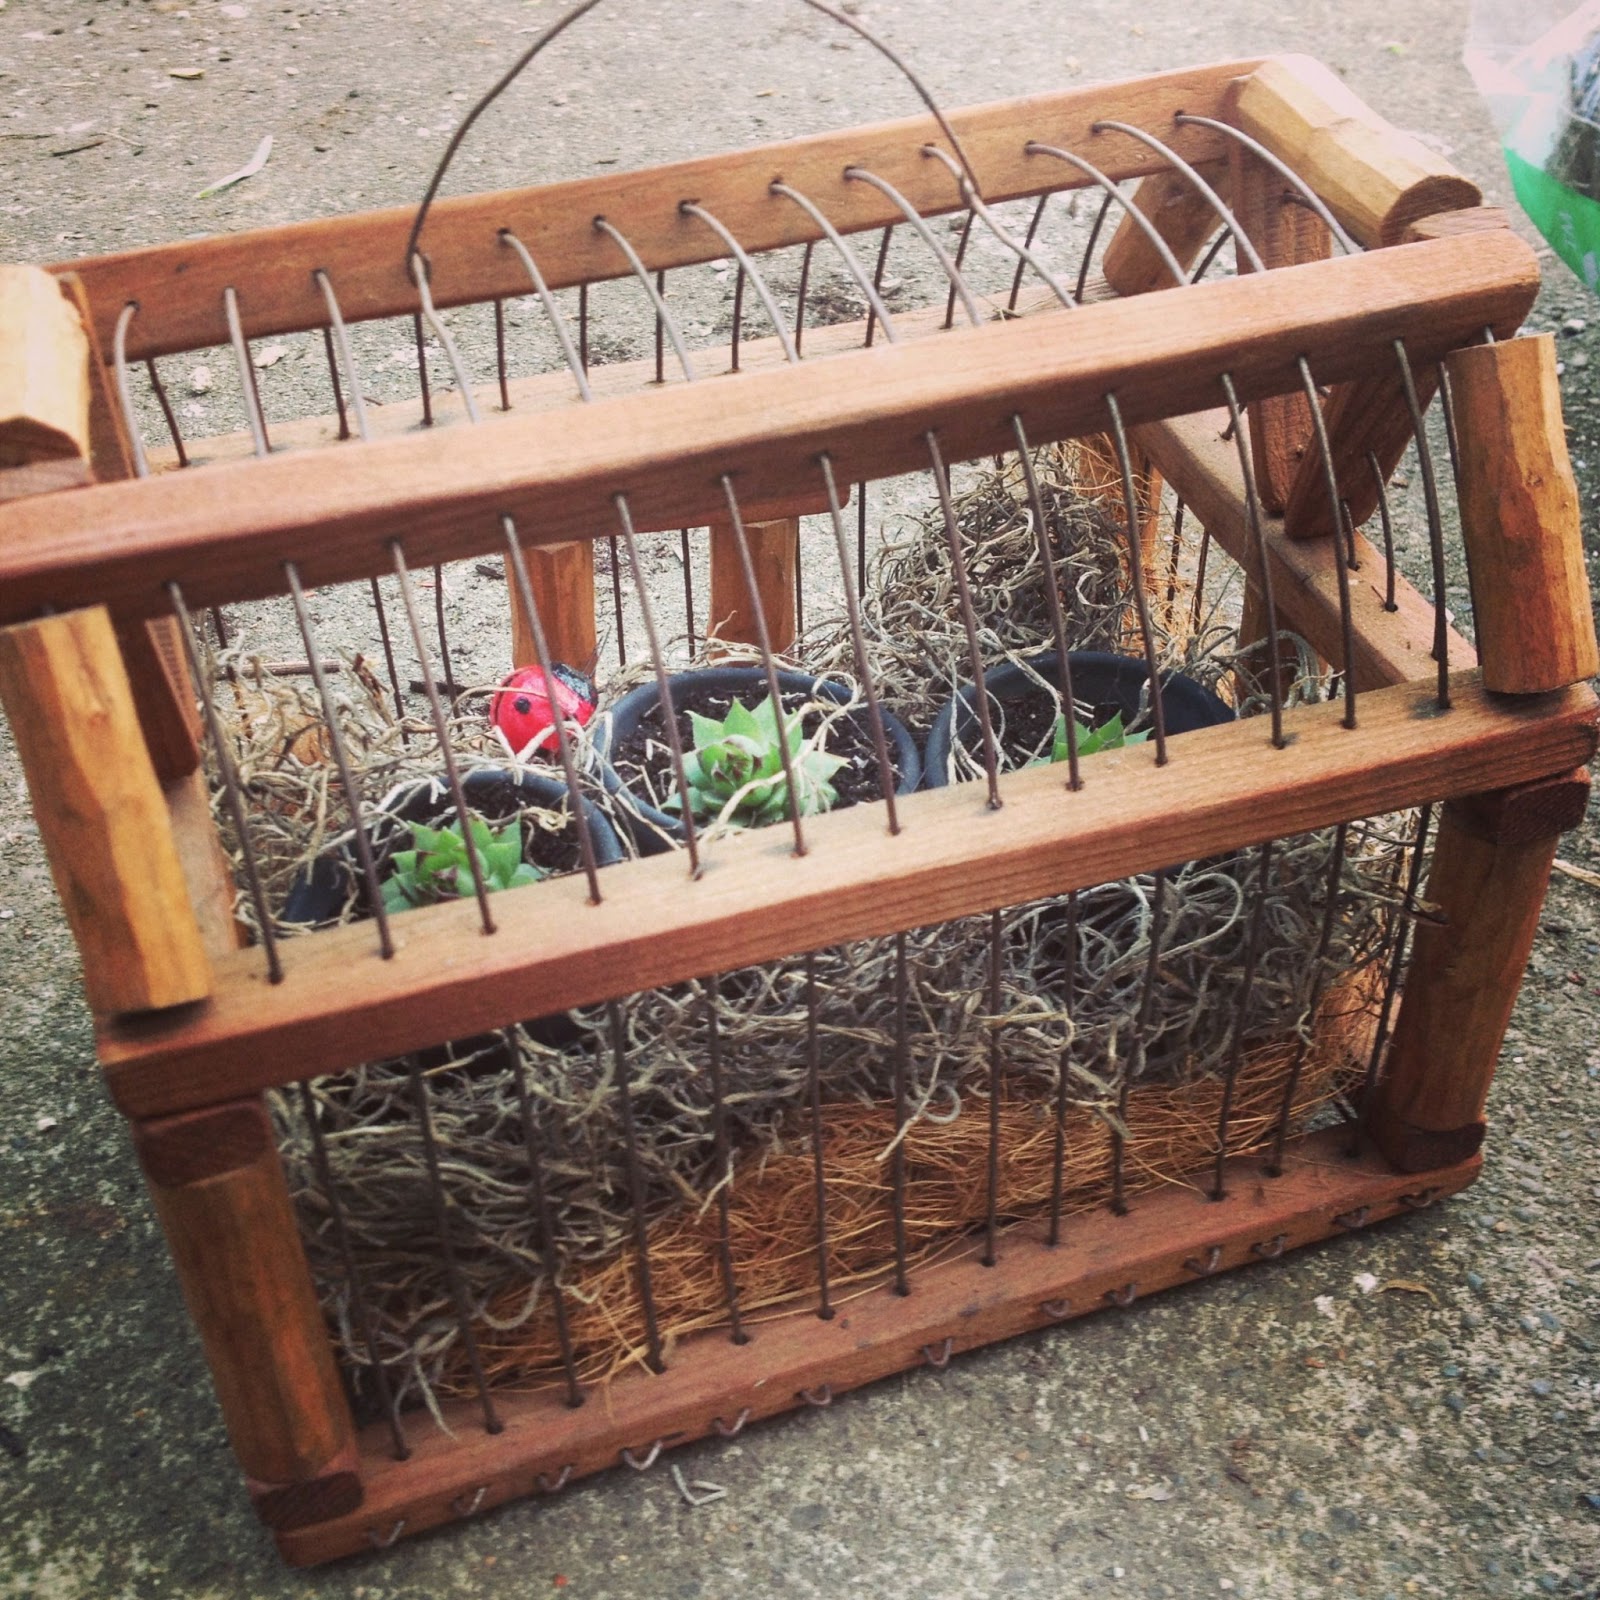
Spring is here and since it's grey and cloudy most days here, I wanted a sweet little table-top garden for my patio table to bring a smile. Here's the step-by-step for making your own table-top bird cage garden.
Supplies you will need:
- small thrift store bird cage (Make sure you can fit your hand and pots in the cage opening.)
- 3 small terracotta pots or any other small container for planting with small drainage trays or rocks in the bottom of the pots for drainage (You may need more or less depending on the size and shape of your birdcage.)
- spray paint (I used chalkboard paint but you could do a fun color instead.)
- potting soil
- little plants, at least one for each pot (Succulents are the easiest for transplanting and surviving and really easy to find.)
- floral decor moss (There are different kinds and colors, use which works for your taste and colors. I used the dull grey moss and some found brown hairy natural material in the bottom for fluffing.)
Now to put it all together!
Step 1: Paint Your Pots
Put your little pots upside down on cardboard or other surface you don't care about getting painted. If you have drainage trays you can paint them too but they won't be visible later. Spray your pots well. Let dry and repeat if a second coat is needed. Flip and spray the top and inside of the rims of the pots. Repeat with your drainage trays if you have any. It's okay if they are painted all through the inside. Let dry. The pots pictured are not the ones I used but an example of how I paint my pots.
Step 2: Add Soil and Plants
When you pots are completely dry, add little rocks or broken pottery chips to the bottom of your pots. You don't need much and the rocks/pottery chips should be small but not clog the drainage holes. Add potting soil to the brim of the pots. Pop your little succulents or chosen plant firmly into the soil. Repeat with all your pots. You can add little pebbles or sea glass around the plant but it may look to busy or get hidden in the moss. Thanks mom for potting the little guys!
Step 3: Assemble Pots and Moss
If you can't fit your hand or pots into your chosen bird cage very well, this step will be challenging. (Can you tell I'm emphasizing this from experience?) Your pots are not heavy so it may take an octopus hand maneuver to achieve the following steps. Place some moss on one end of the cage and hold in place with your first little pot. Put some moss against the opposite edge of your bird cage and slide in your second pot to hold in place. Put some moss around your first and second pots and slide your third pot between them. Add or remove moss in order to see your plants well but have them snugged in with moss. Add a little mushroom bird or bug and lightly water your plants.
Now to put it all together!
Step 1: Paint Your Pots
Put your little pots upside down on cardboard or other surface you don't care about getting painted. If you have drainage trays you can paint them too but they won't be visible later. Spray your pots well. Let dry and repeat if a second coat is needed. Flip and spray the top and inside of the rims of the pots. Repeat with your drainage trays if you have any. It's okay if they are painted all through the inside. Let dry. The pots pictured are not the ones I used but an example of how I paint my pots.
Step 2: Add Soil and Plants
When you pots are completely dry, add little rocks or broken pottery chips to the bottom of your pots. You don't need much and the rocks/pottery chips should be small but not clog the drainage holes. Add potting soil to the brim of the pots. Pop your little succulents or chosen plant firmly into the soil. Repeat with all your pots. You can add little pebbles or sea glass around the plant but it may look to busy or get hidden in the moss. Thanks mom for potting the little guys!
Step 3: Assemble Pots and Moss
If you can't fit your hand or pots into your chosen bird cage very well, this step will be challenging. (Can you tell I'm emphasizing this from experience?) Your pots are not heavy so it may take an octopus hand maneuver to achieve the following steps. Place some moss on one end of the cage and hold in place with your first little pot. Put some moss against the opposite edge of your bird cage and slide in your second pot to hold in place. Put some moss around your first and second pots and slide your third pot between them. Add or remove moss in order to see your plants well but have them snugged in with moss. Add a little mushroom bird or bug and lightly water your plants.
Voila! Bird cage mini-garden for your table or hanging.
If you make your own, please email pictures. I can't wait to see your bird cage garden designs!
Happy Planting,
- Cerise
Monday, April 22, 2013
Sunny Saturday Gnomes
Saturday was sunny and with the first Farmer's Market and Garland's Nursery's open house I was inspired to be outside and in the dirt. I have been wanting to make a gnome garden for quite a while and Garland's has a menagerie of miniature garden accessories. They are not very inexpensive though. Fortunately my craft room always has gnomes, hedgehogs and miniatures running around and I have jar fulls of pretty little rocks and marbles. The only thing I needed were plants gnomes would enjoy in their new garden pot homes. My mom helped with laying garden paths and "lettuce" planting. The little gnomes are hand-made and painted. They still need a door to their house so I will be on the hunt for one. Here's how it all turned out.
Happy Magical Gardening,
- Cerise
Tuesday, June 12, 2012
More garden delights
The back porch is in full foliage and lots of plants are in bloom right now. My clematis came back in full force this spring. It's a terrible pink color in person. Last year it was white with splashes of a mellow pink (as pictured on the plant tag) but it went a little crazy this year. I shouldn't complaint too much because it's beautiful and healthy. One of our nurseries also has a lot of sale plants. I've picked up a few here and there and they are all doing really well. My gerber daisies pittled away quite quickly but popped out a new plant soon after. There are also sweet little carnations that are very happy in there new home and a lovely little vining plant with orange flowers that is going to live with the clematis. I obviously don't think about the colors working together or not! I would love to add more but I don't want to have to move or leave behind a bunch of plants in the not too far future if we move. My beautiful ginkgo will definitely go with me everywhere though!
Happy Blooming,
Cerise : )
Happy Blooming,
Cerise : )
Clematis
Carnations
Wysteria
Monday, June 11, 2012
Didn't you want garden pics?
I went a whole week without posting and my last post didn't even have pictures of all the delicious and nutritious treats growing in our garden. Dale, his mom, and I worked in the garden last night. We got a lot weeded and I thinned out the beets, daikons, radishes, carrots, and rutabagas. There was also an extreme butter lettuce party that the salad police broke up for lunch today. This morning I used the little baby greens that got thinned out for my green smoothie. Some wonderful little fresh garden strawberries also got to join them in the blender. My green gooey breakfast was delicious! The sun looks like it will be out a lot this week so I hope the garden is happy and continues to grow. Time to plant more already too!
Happy Gardening!
Cerise : )
Happy Gardening!
Cerise : )
Oregon Sugar Pod II
Daikon!
Borage with basil, tomatoes, bee balm, and onions in the background.
This is our first companion planting bed!
Sunday, June 3, 2012
Garden Sunday
The weather warmed up sooner than last year but the past two weeks have been a bit cooler and damper. Most things are still growing pretty well but our three experimental tomato plants are rather sad. This year, we are trying companion planting. My store has a great book, How to Grow More Vegetables, that discussed the importance of healthy soil, microclimates, and plant relationships among other things. I highly recommend this book to even beginning gardeners. More pictures to follow, but here's how the garden looked a few weeks ago!
Thursday, January 13, 2011
Spring Is A Brewin'!
I had a little extra time off this afternoon so I decided to get started on a recent idea for spring. I picked up some great milk glass stemmed glasses this weekend and ran out and found a few more fun milk glass and tea cup containers from my two favorite thrift stores (sadly slim pickin's around here). Then the kitchen went from clean to a hot, crafty mess in a matter of seconds. These are a fun spring decoration and are also a great place marker and gift for a party (I am definitely making some for my garden party thisyear). I was inspired by Paper + Craft but I wanted to add a found look and make my creations more gardeny so I added bugs. To keep this exciting, I didn't want to giveaway what these will look like when they are completed so stay tuned for the full details when I get something on those sticks. Can you guess what they might be??
Happy Crafting!
Cerise : )
Friday, August 20, 2010
Garden Beautiful
Okay, this really isn't crafting but I thought I'd share the beautiful sunflowers in the garden. These were random additions to the garden thanks to the birds. They are so amazing!
Happy Gardening!
Cerise : )
Subscribe to:
Posts (Atom)